Virtual staging works on empty rooms. That creates an obvious problem: most properties aren't empty when you photograph them.
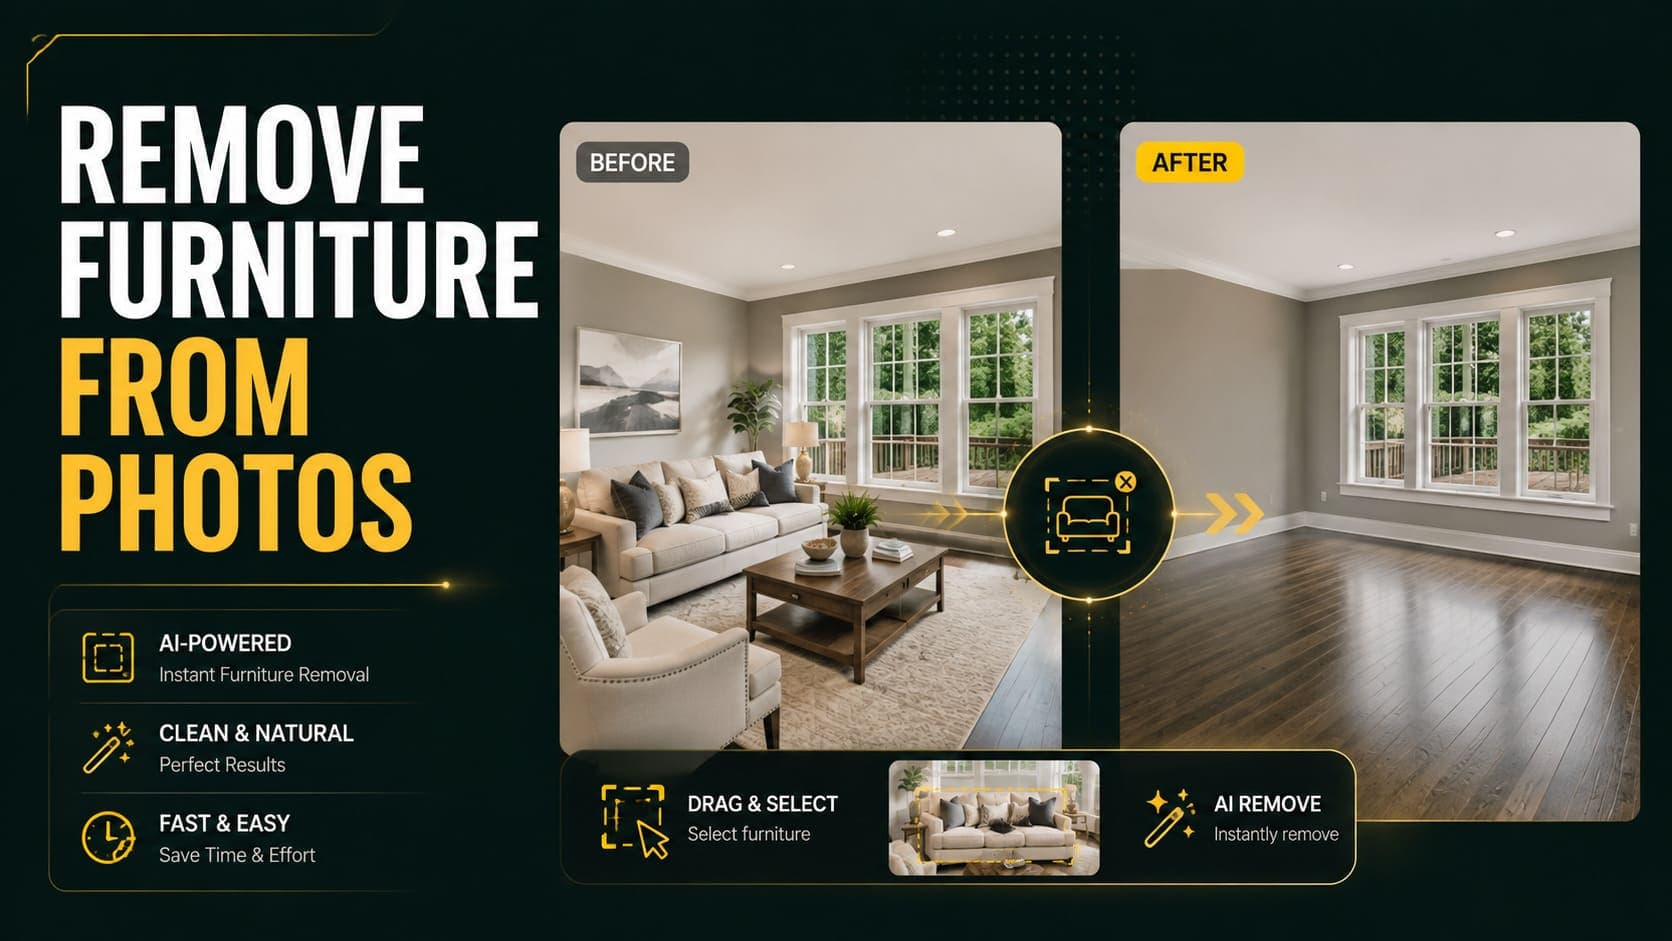
Furniture removal tools solve this by digitally clearing a room before staging it. The technology works reasonably well in specific conditions and poorly in others, and knowing the difference saves considerable time.
How Furniture Removal Works
The process is technically the inverse of staging.
1. Segmentation — The model identifies which pixels belong to furniture versus which belong to the room's structure.
2. Masking — Furniture regions are marked for removal.
3. Inpainting — The model generates what should be behind and beneath the removed objects — the floor, wall, and skirting that were hidden.
4. Harmonization — Lighting and shadows are adjusted so the filled regions match the surrounding room.
Step three is where most failures happen. The model has to invent what was hidden, and it has no actual information about it.
Try DecoAI Free
3 free credits. No credit card needed. Stage any room in 30 seconds.
Get 3 Free CreditsWhat Works Well
Small, Isolated Objects
A single chair in the middle of a room, a coffee table on a plain floor, a lamp against a blank wall.
The model has plenty of surrounding context to work from, and the hidden area is small.
Objects Against Simple Backgrounds
Furniture against plain painted walls and uniform flooring removes cleanly. The model only needs to continue a simple pattern.
Rooms with Sparse Furnishing
Two or three pieces in a large room leaves most of the floor and walls visible, giving the model good reference for what to generate.
Well-Lit Rooms
Even lighting means fewer complex shadows to reconstruct.
What Fails
Heavily Furnished Rooms
A fully furnished living room — sofa, armchairs, coffee table, side tables, rug, bookshelf, TV unit — leaves very little of the actual room visible.
The model ends up inventing most of the floor and much of the wall. Results are frequently implausible.
Practical threshold: if furniture covers more than roughly 40% of the floor, removal quality drops sharply.
Large Objects Against Complex Backgrounds
A wardrobe against patterned wallpaper. A sofa in front of a fireplace. A bed against a panelled wall.
The model has to reconstruct complex detail it can't see, and usually gets it wrong in visible ways.
Built-In and Fixed Elements
Fitted wardrobes, kitchen units, radiators. These aren't furniture in the sense the model understands, and removing them produces obviously wrong results — and would misrepresent the property anyway.
Rooms with Strong Shadows
Furniture casting hard shadows leaves shadow shapes that don't belong to anything after removal. The harmonization step often misses these.
Reflective Surfaces
Mirrors, glass tables, and glossy floors reflect the furniture being removed. The reflections frequently persist after removal.
When It's Worth Doing
Occupied Properties You Can't Clear
The primary case. Tenants in situ, sellers who haven't moved, or properties where clearing is impractical.
One or Two Awkward Pieces
Removing a single oversized item — an inherited wardrobe, a dated sofa — from an otherwise acceptable room.
Rental Properties Between Photographs
Where you have furnished photos and want unfurnished versions for a different marketing angle.
Testing Alternatives
Removing existing furniture and restaging in different styles, to show a buyer what the room could look like.
When It's Not Worth Doing
If You Can Clear the Room Physically
Twenty minutes of moving furniture produces a better result than any removal tool. Where clearing is possible, do that.
Heavily Furnished Rooms
Below the quality threshold. The output will look wrong, and wrong-looking listing photos damage credibility more than furnished photos do.
When the Existing Furniture Looks Good
If the room is well-furnished and photographs well, use it. Buyers respond fine to attractively furnished rooms — there's no requirement to show them empty.
Kitchens and Bathrooms
Both are dominated by fixed elements. There's usually little to remove and the results are unreliable.
Try DecoAI Free
3 free credits. No credit card needed. Stage any room in 30 seconds.
Get 3 Free CreditsPractical Workflow
Step 1: Assess Whether It Will Work
Look at the photo and estimate what percentage of the floor and walls is hidden by furniture.
Under 25% hidden: Removal will likely work well 25–40% hidden: Mixed results, worth trying Over 40% hidden: Consider clearing physically instead
Step 2: Prepare the Photo
Even for removal, photography rules apply:
- All lights on, curtains open
- Shoot from a corner at chest height
- Camera level
- Moderate wide-angle
- Midday light
Better input produces better removal, just as it produces better staging.
Step 3: Remove Small Items Physically First
Before photographing, remove everything portable — cushions, throws, ornaments, small tables, plants, laundry. Leave only what's genuinely difficult to move.
This dramatically improves removal quality and takes five minutes.
Step 4: Run the Removal
Most tools handle this as a single operation. Some let you mark specific objects; others clear everything they identify as furniture.
Step 5: Review Carefully
Removal artifacts are more visible than staging artifacts. Check:
- Floor continuity — does the flooring pattern continue plausibly?
- Skirting boards — are they complete and straight where furniture was?
- Wall texture — does it match the surrounding wall?
- Shadows — are there shadow shapes with nothing casting them?
- Reflections — do mirrors and glass still show removed furniture?
Step 6: Stage the Cleared Room
Once removed, the room can be staged normally. This is often the point of the exercise.
Note: the removal artifacts don't disappear when you stage — they're still in the image underneath. If removal quality was poor, staging on top of it won't fix it.
Furniture Removal vs Photographing Empty
| Factor | Digital removal | Physical clearing |
|---|---|---|
| Time | 1–2 minutes | 20–40 minutes |
| Cost | $0.10–$3 | Free |
| Quality | Variable | Always good |
| Works when | Room is sparsely furnished | Room can be cleared |
| Reliability | Moderate | Complete |
The honest position: physical clearing produces better results whenever it's possible. Digital removal is a workaround for when it isn't.
Common Mistakes
1. Using It on Heavily Furnished Rooms
The most common error. Below roughly 60% visible floor and wall, results degrade badly.
2. Not Removing Portable Items First
Five minutes of clearing cushions, ornaments, and small furniture significantly improves output.
3. Not Reviewing at Full Size
Removal artifacts hide in thumbnails. Check at 100%.
4. Staging Over Poor Removal
Staging doesn't fix removal artifacts. If the cleared image looks wrong, the staged version will too.
5. Removing Fixed Elements
Radiators, fitted wardrobes, and built-in units aren't furniture. Removing them misrepresents the property.
6. Using It When Clearing Is Possible
Twenty minutes of physical work beats any tool. Use removal when clearing genuinely isn't an option.
Frequently Asked Questions
Can AI remove furniture from photos?
Yes, with variable reliability. It works well on sparsely furnished rooms with simple backgrounds and poorly on heavily furnished rooms or complex backgrounds.
How well does furniture removal work?
Good when under roughly 25% of the floor and walls are hidden. Mixed between 25–40%. Poor above that.
Is it better to remove furniture digitally or physically?
Physically, whenever possible. Twenty minutes of clearing produces a better and more reliable result than any removal tool.
Can I remove furniture and then stage the room?
Yes, and it's the usual reason for removing it. But staging doesn't fix removal artifacts — poor removal produces poor staged output.
Does furniture removal work in kitchens?
Poorly. Kitchens are dominated by fixed elements — units, appliances, worktops — that aren't removable furniture.
What are the signs of bad furniture removal?
Discontinuous flooring patterns, broken or missing skirting boards, mismatched wall texture, shadows with nothing casting them, and reflections showing removed items.
Should I remove furniture from an occupied property's photos?
Only if the furniture is genuinely poor and removal quality is acceptable. Well-furnished rooms photograph fine as they are.
How much does AI furniture removal cost?
$0.10–$3 per image depending on the tool, similar to staging pricing.
Can I remove just one piece of furniture?
Some tools allow selective removal by marking specific objects. Others clear everything identified as furniture.
Summary
Furniture removal is a workaround, not a first choice.
Use it when: The room can't be cleared physically, furniture covers under roughly 40% of the visible surfaces, and the background is relatively simple.
Don't use it when: You can clear the room in twenty minutes, the room is heavily furnished, the background is complex, or the existing furniture already photographs well.
The practical rule: clear everything portable before photographing, then remove only what genuinely can't be moved. That combination produces the best results with the least reliance on the tool getting it right.
Once cleared, stage it. DecoAI gives 3 free credits with no card required — enough to test whether a cleared room stages well before committing to the approach.