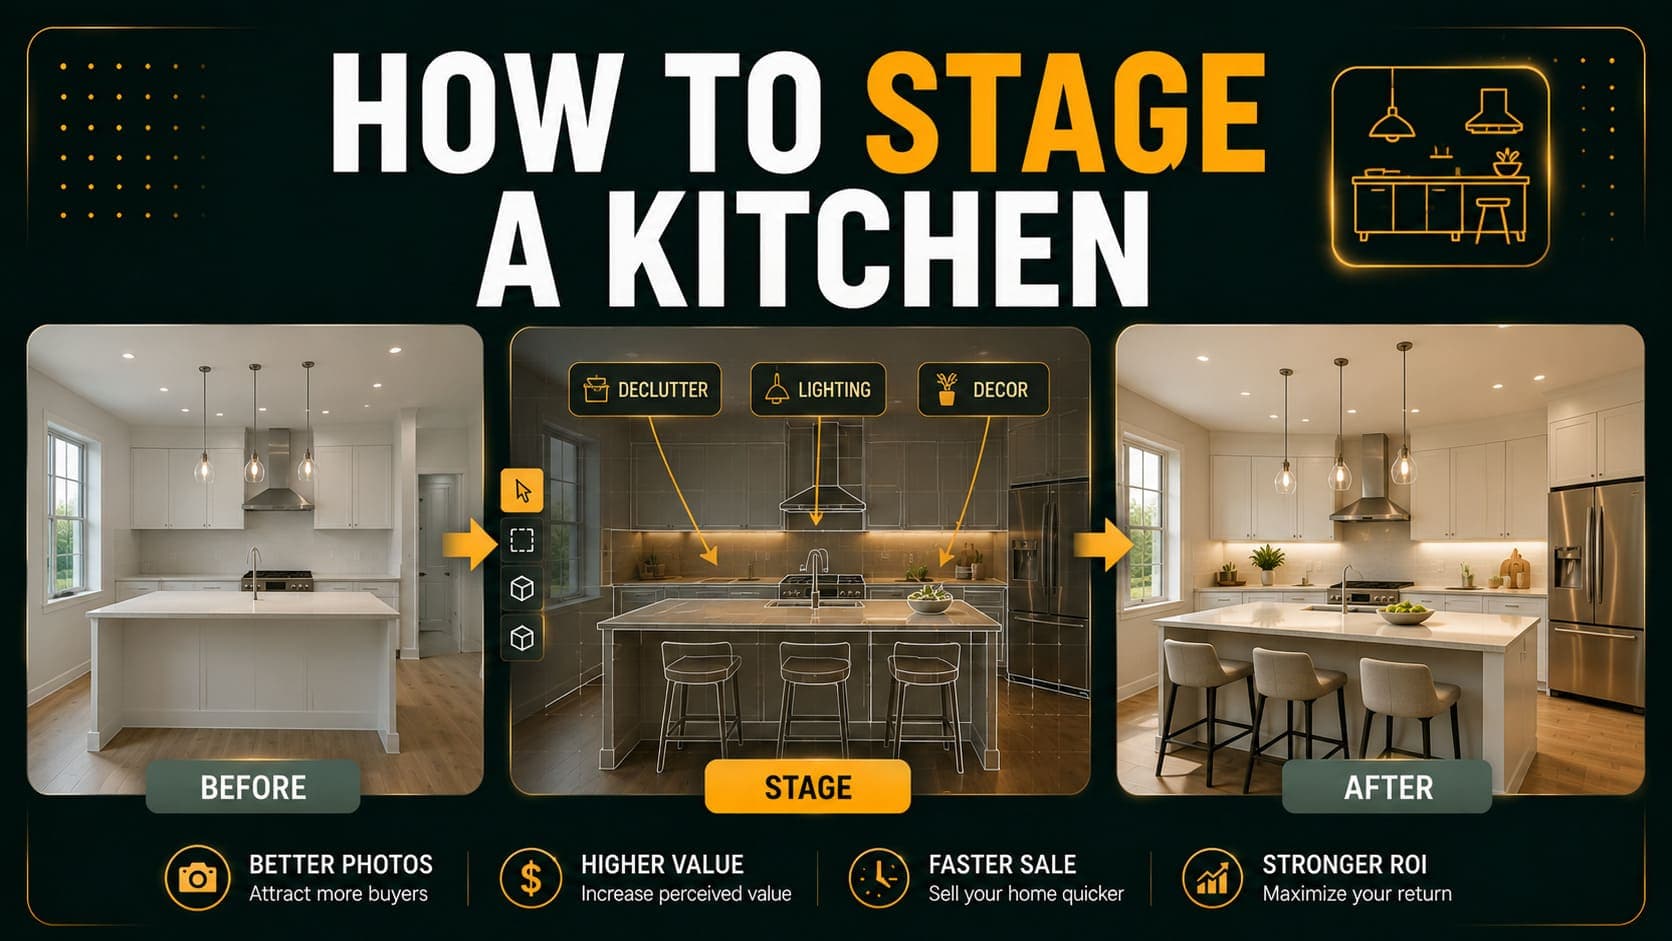
Kitchens are the most scrutinized room in any listing and the least forgiving to stage. Buyers examine kitchens more carefully than any other space — counters, cabinet condition, appliance age, layout, storage.
They're also the room where the usual staging advice breaks down. You're not filling an empty space with furniture. You're mostly removing things and adding a small number of carefully chosen items.
This guide covers what to clear, what to add, how to photograph the room, and where AI staging helps versus where good photography does more.
Why Kitchens Are Different
Three things separate kitchen staging from every other room:
The room is already furnished. Cabinets, counters, and appliances are fixed. You're not placing a sofa — you're refining what's already there.
Buyers inspect rather than imagine. In a living room, buyers picture their life. In a kitchen, they assess condition, storage, and workflow.
Less is genuinely more. A staged living room needs enough furniture to show function. A staged kitchen needs almost nothing — visible counter space is the selling point.
Try DecoAI Free
3 free credits. No credit card needed. Stage any room in 30 seconds.
Get 3 Free CreditsThe Clearing Phase
This is 80% of kitchen staging.
Clear Every Countertop Completely
Every single item. This includes things that feel like they belong:
- Toaster, kettle, coffee machine
- Knife blocks and utensil holders
- Dish racks and drying mats
- Fruit bowls, bread bins, cookie jars
- Soap dispensers and sponges
- Spice racks and oil bottles
- Chopping boards leaning against the backsplash
Empty counters make a kitchen look larger and better-equipped. A kitchen with three appliances on the counter looks like it has less usable workspace than the identical kitchen with none.
Clear the Fridge Exterior
Magnets, photos, children's drawings, shopping lists, calendars. All of it.
A cluttered fridge front is one of the most common issues in listing photos and one of the easiest to fix.
Clear the Sink
No dishes, no washing-up liquid, no sponges, no cloths draped over the tap.
Clear the Windowsill
Plants, jars, ornaments. A clear windowsill maximizes light.
Remove Bins
Freestanding bins take floor space and read as clutter. Move them out entirely for photography.
Remove Rugs and Mats
Kitchen mats break up the floor visually and make the room look smaller. Bare floor photographs better.
What to Add Back
After clearing, add back a very small number of items. The goal is to signal "this is a functioning kitchen" without reintroducing clutter.
The Standard Three
1. A bowl of fruit or a single plant One item on the counter, positioned to one side. It adds a spot of colour and life without occupying meaningful workspace.
2. Bar stools (if there's an island or breakfast bar) Stools communicate that the space is usable for casual eating. Two or three, evenly spaced, tucked in.
3. A tea towel or runner Neatly folded or hung. Adds texture without clutter.
That's It
Resist adding more. Every additional item reduces the visible counter space that buyers are actually assessing.
For Larger Kitchens
If the kitchen has genuine open floor space, one additional element can help:
- A small dining table and chairs if there's a defined eating area
- A single console or sideboard against an empty wall
But only if the space genuinely accommodates it. Cramming furniture into a kitchen to "stage" it works against you.
Photography for Kitchens
Shoot from the Doorway
Kitchens are usually narrow, and the doorway is almost always the position that captures the most of the room.
If the kitchen has multiple entry points, test both.
Or Shoot from the Widest Corner
In larger or open-plan kitchens, a corner shot showing two runs of cabinets usually produces a better composition than a straight-on view.
Camera at Chest Height
Same rule as every room — roughly 1.2 meters, level.
Shooting from higher makes counters dominate the frame. Shooting lower makes cabinets loom.
Include the Window if There Is One
Natural light in a kitchen is a genuine selling point. If a window is in frame, that's usually good.
Watch the Reflections
Stainless steel appliances, glossy cabinet doors, and glass surfaces reflect. Check the frame for:
- Your own reflection in the oven door or fridge
- Reflections of clutter you moved out of shot
- Ceiling light reflections creating hotspots
Adjust your position until reflections are clean.
Turn On Under-Cabinet Lighting
If the kitchen has under-cabinet strips, switch them on. They illuminate the counter surface and make the space look more premium.
Try DecoAI Free
3 free credits. No credit card needed. Stage any room in 30 seconds.
Get 3 Free CreditsKitchen-Specific Advice by Type
Small Galley Kitchens
Approach: Maximum clearing. Nothing on counters at all except possibly one small item. Shoot from: The doorway, straight down the length Goal: Show that both runs of counter are usable
Galley kitchens look cramped easily. Every removed object helps.
L-Shaped Kitchens
Approach: Clear both counter runs. One item at the corner of the L. Shoot from: The corner opposite the L Goal: Show the full working triangle
Island Kitchens
Approach: Island completely clear except one centred item. Bar stools tucked in. Shoot from: The corner that shows the island and the main cabinet run Goal: Show the island's size and the circulation space around it
Open-Plan Kitchen-Diners
Approach: Stage the kitchen minimally and the dining area properly. The dining table can have a simple setting. Shoot from: A position showing both zones Goal: Demonstrate the relationship between cooking and eating space
Dated Kitchens
If the kitchen is genuinely dated, staging won't hide it — and shouldn't try to.
Better approach: Clear it thoroughly, light it well, and photograph it honestly. Buyers factor renovation into their offer, and a clean dated kitchen reads better than a cluttered dated kitchen.
Some AI tools offer surface changes — new cabinet fronts, different countertops — which can show renovation potential. If you use these, label them clearly as visualizations rather than current condition.
Where AI Staging Helps in Kitchens
Kitchen staging is different from other rooms because AI has less to add.
What AI Does Well in Kitchens
- Adding bar stools to an island or breakfast bar
- Placing a small dining set in an open-plan eating area
- Adding tasteful counter accessories
- Improving overall lighting and warmth
What AI Struggles With in Kitchens
- Generating realistic appliances that match the existing ones
- Handling reflective surfaces convincingly
- Placing items on counters without them appearing to float
- Complex layouts with multiple levels or angles
The Practical Conclusion
For most kitchens, thorough clearing and good photography beat AI staging. The room is already furnished, and what buyers want to see is the actual condition.
Use AI staging in kitchens when there's genuine empty space to fill — an island without stools, an eating area without a table — rather than trying to transform the room.
Common Kitchen Staging Mistakes
1. Leaving Appliances on Counters
The most common issue. Toasters and kettles reduce apparent workspace significantly.
2. Fridge Magnets and Photos
Instantly recognizable as an unprepared photo.
3. Dish Racks and Sponges
Signals daily use rather than a presented space.
4. Too Many Decorative Items
Adding back five or six "styling" items recreates the clutter you just removed.
5. Kitchen Mats and Rugs
Break up the floor and make the room look smaller.
6. Shooting Into Reflections
Your own reflection in the oven door appears in more listing photos than you'd expect.
7. Poor Lighting
Kitchens often have less natural light than living areas. Turn on every light including under-cabinet strips.
8. Hiding Problems
Angling the shot to avoid a damaged cabinet or dated appliance. Buyers see it at the viewing, and the mismatch damages trust.
Frequently Asked Questions
Should a staged kitchen have items on the counter?
Almost none. One item — a bowl of fruit or a small plant — is enough. Empty counters make the kitchen look larger and better-equipped.
Where should I photograph a kitchen from?
The doorway usually captures the most of a narrow kitchen. For larger or open-plan kitchens, a corner showing two runs of cabinets works better.
Do I need to stage a kitchen at all?
Less than other rooms. Kitchens are already furnished, so clearing and good photography do most of the work. AI staging helps mainly for adding bar stools or a dining set to genuinely empty space.
How do I make a small kitchen look bigger?
Clear every counter completely, remove mats and bins, turn on all lighting including under-cabinet strips, and shoot from the doorway to show the full length.
Should I remove the microwave and kettle?
Yes for photography. Every appliance on the counter reduces the apparent workspace, which is what buyers are assessing.
What about a dated kitchen?
Clear it thoroughly and photograph it honestly. Buyers factor renovation costs into their offer, and hiding condition creates problems at the viewing.
Can AI staging modernize a kitchen?
Some tools offer surface changes like cabinet colours and countertops. These are best used as clearly labelled renovation visualizations rather than as listing photos.
Should bar stools be tucked in or pulled out?
Tucked in. It shows the circulation space around the island and looks tidier.
How many kitchen photos should a listing have?
Two or three. One wide shot showing the full room, one showing the main working area, and possibly one detail if there's a standout feature.
Quick Checklist
Clear completely
- All countertop appliances
- Knife blocks, utensil holders
- Dish racks and sponges
- Fridge magnets and photos
- Sink items and cloths
- Windowsill objects
- Bins
- Floor mats and rugs
Add back (maximum)
- One bowl of fruit or small plant
- Bar stools if there's an island
- One folded tea towel
Photography
- Shoot from the doorway or widest corner
- Chest height (~1.2m), camera level
- All lights on including under-cabinet
- Check for reflections in appliances
- Include the window if present
Where AI helps
- Adding bar stools to a bare island
- Staging a dining area in open-plan kitchens
- Not much else — clearing does the heavy lifting
Need to stage an open-plan kitchen-diner? DecoAI gives 3 free credits with no card required — useful for showing how a dining area would work alongside the kitchen.